PowerBar® is proud to fuel the BMC Racing Team as their official sports nutrition supplier through 2016. Watch BMC’s top riders try the NEW PowerBar® Performance Energy Wafer Bar and explain why they love using PowerBar products in training and competition.
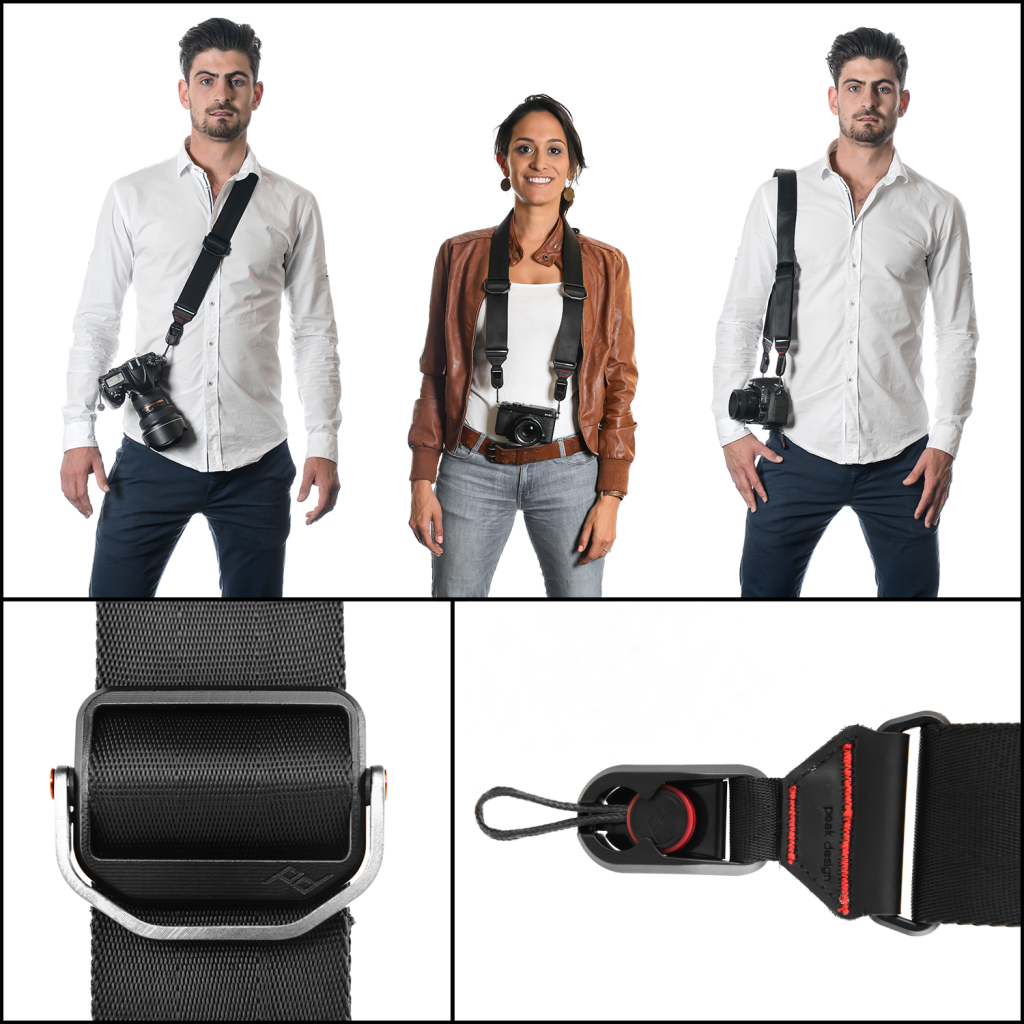
Slide is a camera strap, but one that’s different from every other camera strap out there. Slide is more than just a neck strap, sling strap or shoulder strap. Slide is a new kind of camera strap that incorporates everything we love about existing straps, as well as feedback from thousands of photographers worldwide. In a nutshell, we think Slide is the most thoughtfully designed camera strap ever created.
Wearable as a sling strap, shoulder strap or neck strap.
Quick connecting with one hand, using our patent-pending Anchor Link™ connection system.
Smooth on one side and grippy on the other, and instantly reversible depending on your preference.
Comfortable even with the heaviest of pro cameras.
Made of tubular seatbelt-style webbing with padding on the inside for less bulk and a clean, classic look.
Compatible with ARCA-type tripod heads, so you can place your camera in the tripod without unscrewing anything.
Quickly customizable and adjustable. It can attach to multiple places on your camera and quickly cinch to fit your body type or activity.
More than strong enough to hold any pro camera/lens/accessory combo
Clutch™ is the only quick-connecting, quick-adjusting camera hand strap ever made. Clutch gives you security when you need it, but also allows instant access to your camera’s controls. With materials and hardware inspired by high end climbing gear, Clutch’s simple, rugged design can only be described as “dead sexy.”
Quick connecting with one hand, so you can add or remove it as needed.
Quick adjusting, so you can tighten it when you need extra security and loosen it when you need to access your camera’s controls.
Low profile and unobtrusive compared to other camera hand straps on the market.
Made from premium materials and custom hardware inspired by high-end climbing gear.
Designed to work with or without battery grips, and strong enough to hold any pro camera/lens/accessory combo.
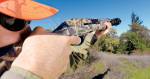
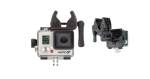
Mount your GoPro to guns, fishing rods and bows. This versatile mount is compatible with most shotguns1, rifles, revolvers, airsoft, paintball and pellet guns, and fits bow components and fishing rod grips with a diameter of 0.3” to 0.9” (10mm to 25mm). You can mount one or two cameras front-facing and/or rear-facing to capture immersive footage from a variety of angles and perspectives. A non-reflective, matte black finish ensures low visibility.
Fits 0.3″ to 0.9″ (10mm to 25mm) diameter gun barrels, fishing rod grips and bow components
Compatible with most shotguns1, rifles, revolvers, airsoft, paintball and pellet guns
Mount one or two cameras to capture footage looking forward, backwards or both directions simultaneously
When used with a gun or fishing rod, camera(s) can be mounted below or to the side of the barrel or rod
Non-reflective, matte black finish ensures low visibility
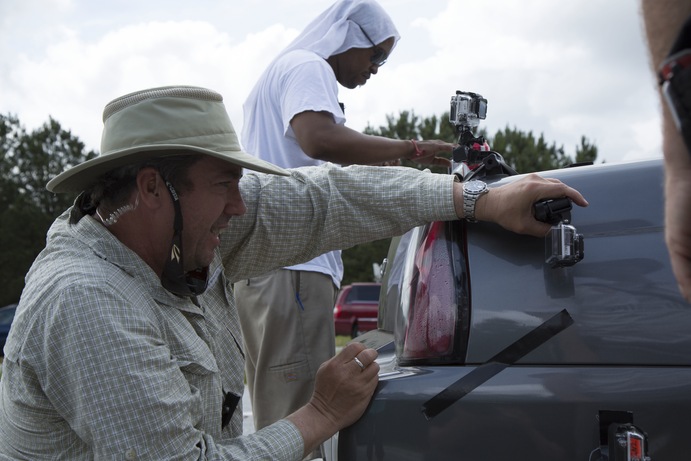
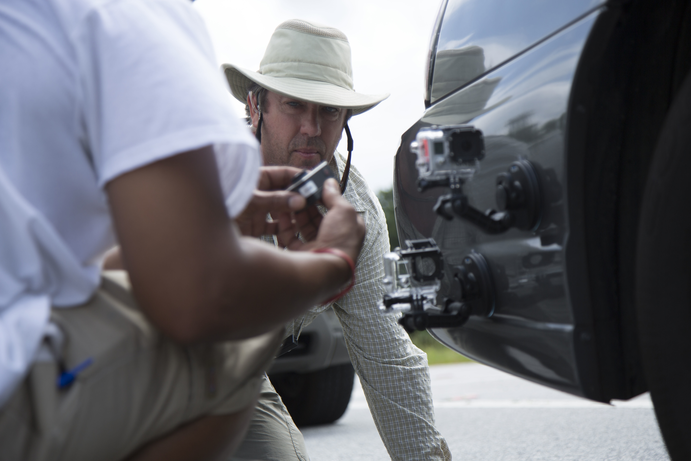
Shane Hurlbut, ASC Cinematographer on Need for Speed, mounts GoPro cameras on set
There’s big news from GoPro for filmmakers and cinematographers and anyone who creating content with the GoPro HERO3+ for professional productions and who need to make sure they’re adhering to industry standards with their pipelines. We’re proud to announce that the GoPro CineForm Codec has been standardized by the Society of Motion Picture and Television Engineers® (SMPTE®) as the SMPTE ST 2073 VC-5 video compression standard – the new open codec standard for video acquisition and post production.
So what does all this mean? To start, SMPTE is THE organization that determines the digital cinema standards across the entire production and post-production ecosystem. When the pros want to know which technologies are going to work flawlessly for their multi-million dollar productions, they turn to SMPTE to see which ones fit the bill. It’s kind of like the Good Housekeeping Seal of Approval.
And why is quality compression important? Well if you’re shooting GoPro, you know that those stunning images out of the camera are huge files. They need to be compressed – quickly, without comprising image quality, and in the right file formats so editors and VFX artists can bring those files into their workflow and start creating – right away. For these guys, when they see that a technology is a SMPTE standard, they know it’s going to work. And when your feature film is on the line, you need that peace of mind.
If you’re a filmmaker or cinematographer, you already know that the GoPro CineForm Codec is a high-performance video codec widely valued in video post-production as the industry’s highest quality compression format. It is well established in the professional filmmaking marketplace and has been extensively used in Hollywood feature films, including Slumdog Millionaire and Need for Speed.
Photo Caption: Shane Hurlbut, ASC Cinematographer on Need for Speed, oversees the mounting of GoPro cameras on set
SMPTE standardization of the GoPro CineForm codec as the VC-5 standard now means the professional production and post production community can access SMPTE-standardized codec technology for presenting high resolution imagery with a high speed, low-compute intensive workflow. The new VC-5 standard will provide a more efficient, cost effective and higher-performance workflow, delivering an 8x performance boost over the current JPEG 2000 format with higher resolution.
“SMPTE standardization of the GoPro CineForm codec as the new VC-5 standard is big news for the entire production and post production industry, as well as for GoPro and its customers,” said David Newman, senior director of software engineering for GoPro. “By further developing the VC-5 standard, we are building a new ecosystem for the industry in which we’re enabling cinema-level acquisition quality, while also providing cinematographers the workflow technology to finish their films. We are standardizing core codec technologies, and making them extensible to even support future camera formats and future post production workflows. This is a major milestone and a huge accomplishment for GoPro!”
The GoPro CineForm Codec supports RAW camera formats such as CFA Bayer pattern images as well as RGB and YCrCb with an optional alpha channel and sub-sampled color difference components.
Participation by the broader video community in the SMPTE ST 2073 VC-5 standard process will enhance the GoPro CineForm Codec to make it more suitable for a wider range of applications. Interested parties are also encouraged to join the SMPTE Standards Committee and participate in the ongoing development of the SMPTE ST 2073 VC-5 specification. The group is particularly interested in feedback from video-editing professionals regarding their experience with video compression technologies and their requirements for use of a VC-5 codec in their video workflows.
Mike Montgomery at the GoPro Mountain Games sharing his tips for mounting cameras on a mountain bike and helmet and capturing different perspectives while riding on the trails. Plus, get some ProTune tips.
Athlete: Mike Montgomery
Vertical: Mountain Biking
Topics: Protune Shooting Modes, Roll Bar Mount, Handlebar/Seatpost/Pole Mount, Blackout Housing
In episode 19 of GoPro’s Athlete Tips and Tricks series, Mike Montgomery meets up with us at the GoPro Mountain Games to share his tips for mounting cameras on a mountain bike and helmet. He shows us how to use the Blackout Housing with a variety of mounts to capture different perspectives while riding on the trails. Mike also shares his favorite video mode for POV cams — 1440/48 in Protune with ISO 400.
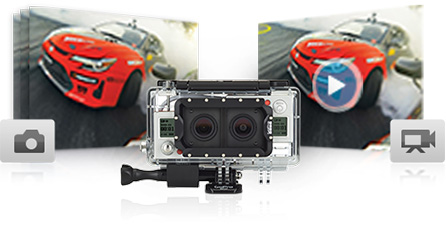
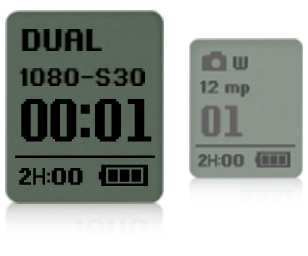
The new Dual HERO System holds two HERO3+ Black cameras (sold separately), enabling you to capture full-resolution video and photos simultaneously with uncompromised image quality. You can also record synchronized footage to convert to 3D using GoPro Studio editing software, available free at gopro.com. Creating 3D content has never been easier.
Capture video and photos simultaneously
The Dual HERO System enables you to capture full-resolution video and photos simultaneously with uncompromised image quality.
Create 3D content
Imagine how incredible your footage would look in 3D. The Dual HERO System makes it easy to record synchronized 2D videos or photos to convert to 3D using free GoPro Studio editing software.
Control both cameras at once
Featuring single interface control, one camera controls the other camera’s settings and modes for convenient setup.
Integrated Mini USB port
Use the included Skeleton Backdoor to access the Dual HERO System’s integrated Mini USB port for data offload, battery charging, and live-feed video to an external monitor (requires GoPro Composite or Combo Cable, sold separately).
Waterproof and durable
The Dual HERO System is waterproof to 197’ (60m), and made to withstand wet, damp or dirty conditions so you can capture footage in nearly any environment.
Includes 3D glasses
View the 3D content you’ve created on your compatible 3D TV or computer with the included 3D anaglyph glasses.
Andrew Whiteford has been synonymous with the explosion in popularity of POV cameras and the flood of self-edits that rob Youtube of its bandwidth year in and year out. The Vermont transplant to Jackson Hole was one of the first in skiing to turn himself pro almost exclusively through the use of his own self-edits, and then repeated the feat in the bike world. Here Andrew shares a few of his secrets that will help you turn your own POV edits from messes of shaky footage and unremarkable angles into the internet gold of tomorrow.
#1 – MIX UP YOUR ANGLES
Andrew mounted his GoPro way up on an extended pole to capture his rappell into a conical ice cave in Alaska.
I film a lot and then I try to be really selective with the clips that I use. I try to keep just the A-roll footage. I always just keep it in my mind the idea that I’m watching a ski movie, and what I’d want to happen. Sometimes I want that feeling of your stomach going up into your throat as you come over the edge of the cliff, which lends itself to the helmet-mounted view. If it’s something more immersive when you’re on a bike, you can use the chest cam, or the pole cam if you’re skiing through something really narrow or super-deep powder. The pole cam is great, too, for when interesting things are going on around you or something ridiculous is happening to you, like a branch hitting you in the face. But in the end, I end up using the helmet cam so much because it tends to be the smoothest. And it’s kind of a “set it and forget it” kind of thing, and I don’t mind the Teletubby look so much.
If I’m reviewing footage, I’ll find shots I thought weren’t super cool at the time that actually look really cool on camera. I’ll always keep those in the running for shots to use, at least to mix it up. I think with ski mountaineering becoming a bigger part of what I’m looking to do, being able to show climbing footage and repelling and all that is really fun.
In the summer, when you’re on your bike or doing another sport, it’s nice to be able to go out in a lot of different weather and in different climates and in different ecosystems and shoot. It’s way more interesting to be able to show the desert and then the rainforest and then deciduous forest and foliage and all of that. Whereas when you’re skiing or snowboarding, it’s always a snow-covered mountain.
#2 – KEEP IT SHORT AND RELATABLE
Nowadays, the POV market is so saturated. We could have our choice of a thousand different videos of the same thing to watch every day. So it’s a battle to keep people interested for the couple of minutes that you can, if that. I struggle with keeping my videos short enough that people watch until the end. I often have to weigh that short attention span more than the value of any story that I’m trying to convey through the video. But in the end, it’s just me trying to show how much fun I’m having out there.
The self-edit is always a fine line between having something that looks really cool and is compelling, but shows that you aren’t trying super hard. That keeps it original and more relatable. Because if you start putting up flashy titles and stuff like that, all of a sudden, you’re being compared against TGR or Brain Farm or Ant Hill. And then you’ve got to find a couple of million dollars for your budget.
#3 – WATCH YOUR ANGLES AND TIGHTEN YOUR MOUNTS
The mistake that most people make with their POV edits is having really shaky footage, which is often due to not having the mounts on tight enough is. The angle of the camera is a big thing, too, and I still struggle with that. It’s often a balance of trying to find an angle where you can see the action and some of your skis or bike, but can still see the horizon so you have some perspective and don’t get carsick.
#4 – TRY ROLLING SOLO WHEN YOU’RE EXPERIMENTING
Whiteford’s awful shy when he’s utilizing his most outlandish POV mounts, so he picks the worst weather days to use tools like his “Narwal mount” in the hopes no one else is out on the trail.
When I’m shooting my POV stuff, I’m often out alone. Particularly if I’m using some really dorky mount, like the Narwhal cam protruding from my helmet. That Narwhal cam involved strapping a 150-centimeter aluminum cross-country ski pole to the top of the helmet and attaching an L-bracket on the back of the helmet, into which I put a 24-ounce PBR tall boy as a counterweight. After all, you gotta have something to drink at the end. Any time I went out with that thing, it was on a shitty weather day so I wouldn’t run into anybody else on the trail. Because I just looked like a total goober. And I only rode the trails I knew super well and could ride smoothly so that the footage had the best chance of coming out well.
#5 – AUDIO IS KEY
While we always focus so much on the video, finding some cool audio to go along with it is absolutely critical. The best-case scenario is the actual activity that you’re filming has some cool ambient audio. I’ve always felt that the soundtrack plays a huge part in what you’re trying to put out in order to make it watchable, too. Obviously, I didn’t have Wiz Khalifa’s permission to use “Black and Yellow,” but on the small side of the spectrum, I think you can get away with a lot. When GoPro shares one of my videos and gets a couple hundred thousand views in a few minutes, that’s when I usually get a cease and desist letter.
Want to know more about Andrew Whiteford? Read Teton Gravity Research’s May 21st interview with Andrew about how he became internet famous here.
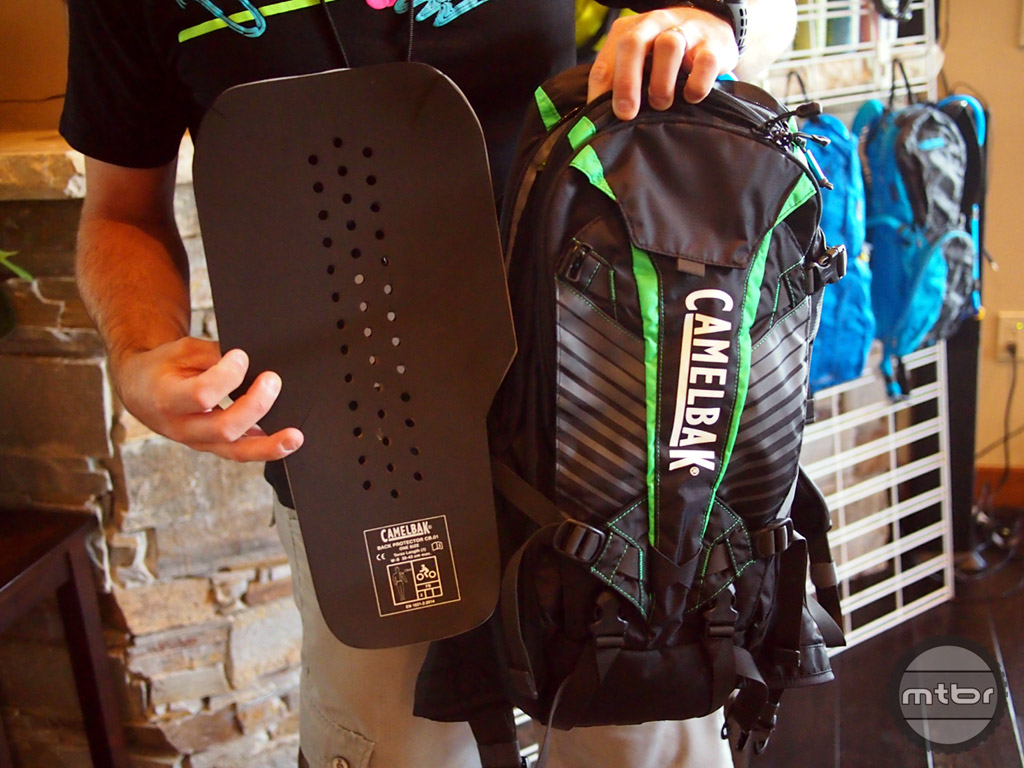
CamelBak has announced a brand new hydration pack for 2015 called the Kudu that features built-in impact protection in the form of a foam back armor insert that should appeal to the enduro racer or park rider.
In this video, Seth Beiden from CamelBak shows us the highlights of the Kudu 12 and Kudu 18.
The protection insert is CE 1621-2 Level 2 certified protector, which means that it has been tested and approved for motorcycle use (CE 1621-2 Level 2 is a much higher impact protection than Level 1). The protector is lightweight and flexible and can withstand multiple hits. If you don’t need the armor, it is removable and can be cleaned and inspected.
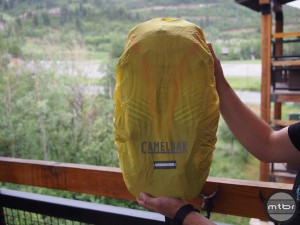
The Kudu is available in two sizes, the Kudu 12 holds 12 liters and the Kudu 18 holds 18 liters of cargo. Besides the cool armor, the Kudu also has a nice tool roll that is easily removable for having direct, easy access for your trail side repairs. If you ride in wet weather, there is a built-in (and removable) waterproof rain cover that deploys from the bottom of the pack.
The Kudu also has options for helmet carrying (including full face helmets) and the ability to carry knee and elbow armor via side and bottom straps. The Kudu 12 comes in two graphics red/yellow (officially called Barbados Cherry/Sulphur Springs) and blue/pink/grey (officially Charcoal/ Atomic Blue) and the Kudu 18 comes in three graphics ( Barbados Cherry/ Sulphur Springs – Black/ Andean Toucan – Silver/ Atomic Blue). The MSRP for the Kudu 12 with 100oz reservoir and back protector is $200 and the Kudu 18 is $225. Both models will be available January 2015.
Check out more photos of the Kudu and some photos of other new packs from CamelBak coming for 2015.


 Waterproof and durable
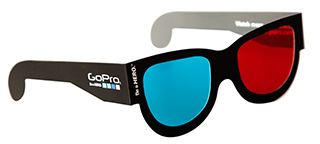


You must be logged in to post a comment.